If you’re looking for a guide on how to write blog posts with Jasper AI, then you’ve come to the right place.
Jasper AI, formerly known as Jarvis AI, has seen a rapid rise in popularity among business owners, marketers, and entrepreneurs because it enables these individuals to increase the amount of long-form content they produce by over five times in a fraction of the time. This is accomplished by releasing GPT-4 technology’s AI-generating capability.
If you want to understand everything there is to know about Jasper AI and who it is best suited for, read my comprehensive Jasper AI review and Jasper AI pricing guide.
While Jasper is becoming increasingly popular, many users are still unsure how to use it to write long-form material such as blog articles.
This is where this Jasper blog post guide comes in handy! In this tutorial, I’ll show you how to write blog posts with Jasper AI, upload them to WordPress, and then optimize them for SEO, so they rank on Google.
Contents
Before You Start Writing Blog Posts With Jasper AI
First and foremost, before you can begin writing blog posts with Jasper’s long-form AI editor, you need to choose a plan.
Jasper AI Creator Plan vs. Teams Plan
Before this new pricing revamps, Jasper AI had a Starter plan that didn’t include the long-form writing feature. You had to subscribe to the Boss Mode plan.
Fortunately, they developed past that limitation, and now all plans (Creator, Teams, and Business) offer unlimited words and long-form writing, among other impressive features.
Here’s a brief summary of what’s included in the Creator plan:
- 50+ short-form copywriting templates.
- One brand voice tone.
- Jasper Commands – With a command, you can tell Jasper what to write and then see him magically create your article. Here’s an example: “Write an introduction paragraph describing how to write blog articles with Jasper AI.”
- Jasper can read the last 1,500 characters of text to figure out what to write next.
- Jasper Art to create unlimited AI images.
- No Jasper Recipes.
And here’s what you get by activating the Teams plan:
- SEO Mode allows you to integrate with Surfer SEO to optimize your posts for higher rankings.
- Jasper Recipes – Jasper recipes are predesigned frameworks that include a set of Jasper Commands to help you develop content faster.
- Three brand voice tones.
In other words, the Creator plan is best for solopreneurs looking to generate AI content such as blog posts, articles, social media ads, images and art, SEO metadata, high-converting email headlines, and other types of content.
But if you have a team who needs to use Jasper to create content, you must subscribe to the Teams plan.
If you want to learn how to write blog posts with Jasper AI, keep reading.
How To Write Blog Posts With Jasper AI
Now that you have your free trial activated, you can start writing content with Jasper, including blog posts.
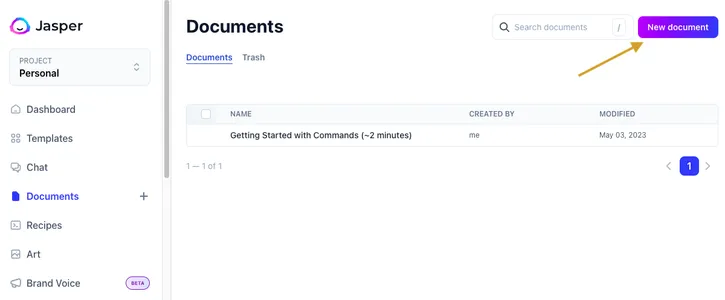
By clicking the New document button, you’ll see the following screen.

This AI software gives you two options for writing blog posts:
- Freeform, which allows you to start from scratch with any template.
- Workflows, which allows you to select several workflows for a seamless AI generation.
Start From Scratch
Selecting the Start from scratch option will display a blank long-form editor in Focus mode.

As you can see in the left part of the screen, Jasper AI lets you input the following:
- Content description/brief.
- The tone of voice.
- Keywords.
You can also choose the output length of the AI-generated text from Shorter (S), Medium (M) to Longer (L).
To generate a blog post from scratch using Jasper AI, you may begin by typing an introductory paragraph or hitting the Compose button and letting Jasper come up with a beginning paragraph based on your inputs.
On the other hand. you might have writer’s block if you stare at a blank page. Therefore I’ll cover the blog post workflow option in this article.
Blog Post Workflow
When you select the blog post workflow, you will be taken to a screen where you may configure your Jasper blog post template in a step-by-step manner.
First, you need to provide a summary of the content for the blog post that you intend to write.
1. Content Description & Blog Post Intro Paragraph

This stage is crucial because the output that Jasper writes for your blog post will be partially determined by the quality of the content that you instruct Jasper to write about for your blog post.
Keep in mind that Jasper is your virtual assistant when it comes to composing blog posts. He won’t write your entire blog article for you, word for word, without requiring any human editing in any way, shape, or form.
You will need to direct Jasper so that he can assist you in writing better blog posts that can rank higher on Google.
Using Jasper as a tool and expecting it to write everything for you is a recipe for disappointment. You’ll grow more frustrated the more you do this.
The more you think about Jasper AI as a copywriting assistant who is working to support you in generating fantastic blog posts much more quickly than you would otherwise, the more joy you will have from using Jasper.
In light of this, let’s discuss with Jasper what content we want to include in the blog post we are working on together.
For this particular example, let’s say we want to write a blog post about “How to write blog posts with AI that rank on Google.”
In the Content description, you may write something along these lines (up to 200 characters):
Write a blog post about how to write blog posts with AI that rank on Google. It should go over the main points of how bloggers and content writers can use AI to write content that can rank on Google.
Make the most of the 200 characters you have in this section by being concise. However, the Content description is totally optional, as you have the option to toggle it on or off.
Next, you should write your blog post title, the audience it is intended for, and your preferred tone of voice. This will give Jasper all the information it needs to generate your blog post intro.
Tip: You can also use the blog post topic ideas template to develop different blog titles.
If you’re happy with the result, you may click Next. If not, click Generate again until you’re good to go.
2. Blog Post Outline
Next comes the blog post outline. You only have to hit the Generate button and let Jasper do the magic!
You can further edit the outline and add more items if you wish.
3. Paragraph Generator
Depending on the number of headings in your blog post outline, Jasper’s blog post workflow will create a paragraph template for each.

You may edit the paragraph description to tell Jasper more relevant information you want it to write. Next, be sure to include keywords you’d like to target. And don’t forget to choose your tone of voice.
A cool feature here is that after Jasper generates your paragraph, you can also generate an image based on its content.

Simply select the image you want, and the tool will place it in the text editor after the respective paragraph.
4. Blog Post Conclusion

After generating a paragraph for each outline topic, Jasper will craft a blog post conclusion paragraph based on the main points you want or the outline it generated.
You may add a captivating call to action, enticing your readers to embark on a specific journey or task.
5. Blog Post Finished
You have now finished customizing the Jasper blog post workflow in its entirety.
Unfortunately, you don’t have the option to go back and rewrite a paragraph once it is done. You have to go through the workflow in its entirety before you can even restart the workflow.
How To Create A Blog Post Outline With Jasper Commands
In our example, our blog post title is:
- How to Write Blog Posts With AI That Rank on Google: The Ultimate Guide
To create a blog post outline with Jasper AI, all you have to do is write the following Jasper Command on the floating box on the bottom of the editor:

When you have finished running the Jasper Command, sit back and watch as Jasper reads your command and immediately generates a blog outline based on your title.
Here’s what Jasper created.

Note: The blog post outline will be shorter or longer depending on your selected output length. In this example, I have chosen Longer (L).
That’s so simple, isn’t it? Just tell Jasper what to write, and he will immediately generate a blog post outline in the text editor within seconds. You only need to instruct him on what to write.
How To Create A Blog Post Outline With Jasper Power Mode
You don’t need Jasper Commands to create a blog post outline if you don’t want to.
There’s another option: Jasper Power Mode.
To select the Jasper Power Mode, click on the Power Mode icon at the top of the screen.

Your screen will be split into two sections:
- Copywriting tools.
- Documents editor.
To create a blog post outline with Jasper Power Mode active, follow these steps:
- Select Power Mode in the top-center of the screen.
- Choose the Blog Post Outline template.
- Insert your blog post title.
- Choose your desired tone of voice.
- Click on Generate AI content.

As you can see, Jasper created three outputs. If you’re disappointed with the result, you can generate more outlines until you are satisfied.
All you have to do now is select the one that pleases you the most and copy it to the text editor on the right.
You may now convert your headings into H2 elements by using the built-in stylistic options available in the editor.

To do that, select the text you want to format and click on the appropriate heading (H2 in this example).
Basic blog post heading rules:
- Blog post title – H1 heading
- Blog post outline points – H2 heading
- Different topics inside each H2 – H3 heading.
- And so on.
Here’s what your post should look like at this point.

Blog Post Conclusion
At this stage, your blog post should have the following content:
- Title.
- Intro.
- Outline.
Before writing the entirety of the content for our blog post, the next task on our list will be to write a concluding paragraph.
Just like Jasper AI is capable of generating blog post introductions, it can also create blog post conclusions.
But why do we need to write the conclusion paragraph before writing the rest of the content?
Because Jasper can read the past 1,500 characters, and because we have already typed the title of our blog post, the introduction paragraph, and the outline for our blog post, Jasper will be able to read all of that information and will be able to develop a more effective conclusion paragraph for you.
If we had already written our entire blog post, Jasper would only be able to read the last 1,500 characters of your entire blog post. As a result, if you had a 3,000-word blog post, Jasper wouldn’t have the best information to write a conclusion paragraph summarizing your blog post well.
How To Create a Blog Post Conclusion With Jasper Commands
To generate a blog post conclusion with a Jasper Command, type the following in the floating bar on the long-form editor:
write a conclusion about the above content.

OR

summarize the above content.
Using Jasper Commands, you can ask Jasper anything you want. He understands you well enough to determine what you’re asking.

How To Create a Blog Post Conclusion With Jasper Power Mode
As we did for the blog post outline, you can generate a blog post conclusion using Jasper Power Mode.
You only need to select the Blog Post Conclusion Paragraph template, insert the required information, and click on Generate AI content.

How To Create a Blog Post Conclusion With Transition Words
Besides generating blog post conclusions with Jasper Commands and the Power Mode, you can also leverage transition words, such as “concluding,” “summarizing,” or “in conclusion,” among others.
If you already have your blog post title, intro paragraph, and outline in your Documents editor, you can type “Concluding” and then hit the Jasper Compose button—Jasper AI will conclude your blog post.
How to Write Blog Post Paragraphs with Jasper
If you don’t want to use the blog post workflow, you may leverage the Paragraph Generator template to help you create your blog post paragraphs and develop your outline points.
The very last thing that needs to be done before you can transfer your Jasper blog post over to WordPress is actually to generate its content.
Related: Best AI Paragraph Generators
Jasper Paragraph Generator
Let’s see how to use Jasper AI to write blog post paragraphs.

As you can see on the left side of the screen (in Power Mode), you have all the templates Jasper offers. Select the Paragraph Generator and type the following content:
- Paragraph description.
- Keywords to include.
- The tone of voice.
Select the number of outputs you want it to generate, and hit Generate. It’s easy as it gets!
If you remember what I mentioned in the first phase of this Jasper blog post lesson, you should be using Jasper as your blog post assistant. This means that you should think of Jasper as someone who writes alongside you to help you create blog posts much more quickly than usual.
If you come to this stage of the process and expect Jasper to write 100% of your 2,000-word blog article word for word without the need for any human editing, you will be disappointed.
To make it even more amazing, there are numerous ways to add a human element to your blog article, such as humor, uniqueness, and wit.
How to Write Blog Post Paragraphs With Jasper AI Commands
Jasper has improved a lot since its earlier versions with the Boss Mode. To generate paragraphs with Jasper Commands, here’s what you have to do:
- Place the cursor where you want.
- Type your command in the floating text box.
- Hit Run Command.
Here’s what it looks like when you put the above in action.

Tip: If you are having problems with Jasper repeating himself or duplicating content, you can try inserting three asterisks before a heading and concentrating solely on that heading and that section. This should solve the problem.
Because Jasper can only concentrate on talking about that heading without repeating anything, I’ve generally noticed better results when adding the three asterisks before headings.
The Jasper Commands can also be changed however you like. You could instruct Jasper to create a list of bullet points instead of an introduction paragraph if you don’t want him to write an introduction paragraph for your headings.
You can still easily come up with engaging blog post content by letting Jasper come up with words on its own if you don’t want to use Jasper Commands to instruct it on what to write.
Simply click the Jasper Compose button (Cmd + J for Mac or Ctrl + J for Windows) with your cursor under each heading to have Jasper start writing blog post content about that heading.
Use the same procedures to write content for the remaining headings of your blog posts once you have enough written for your first heading.
And if you use transition words, you’ll be making your blog post more organic and human-friendly.
By completing all these steps, you should have your blog almost finished. However, there are some key aspects you should keep in mind:
- If Jasper wrote anything about facts, check, check, and check! Fact check is crucial if you’re not sure about its veracity.
- Put your own twist on the article to make it more approachable, add some humor, and make it more personalized.
Grammar Checker
Now that you have finished writing your entire blog post with Jasper AI as your assistant, there’s a last step you shouldn’t bypass: checking your grammar.
Although Jasper is a machine, sometimes its grammar may not be accurate. Thanks to the Jasper AI team, Jasper includes the Grammarly add-on that helps you check the grammar of your content.
How To Use Grammarly With Jasper AI
Have you noticed the Grammarly icon on the top-right of the Documents editor?

Make sure the Grammarly icon is active (green). When active, you’ll see red lines under each grammar error.
Note: Sometimes, Grammarly identifies an “error,” which may not be exactly an error. You must use your discernment to determine whether or not it makes sense.
The Grammarly free version is fantastic and assists in highlighting any glaring spelling or grammar errors that you (or Jasper) may have made when composing your blog article.
Although Grammarly’s free edition is wonderful, I upgraded to the premium version and started using the Chrome extension.
The built-in Grammarly feature within the Jasper editor will simply be overridden if you use the Chrome extension instead, and everything will continue to function normally.
Ensure Grammarly is set to run inside the Jasper AI program once the extension has been added to your browser.

Make sure the toggle labeled “Check for writing suggestions on app.jasper.ai” is set to “ON” by selecting the Grammarly extension from the extension bar.
You should use Grammarly Premium if you want to enhance the substance of your blog posts even further. The icing on the cake for Jasper users is that Grammarly Premium delivers over 400 different tests, finds grammatical faults, improves vocabulary usage, and offers citation suggestions.
How To Use Plagiarism Checker With Jasper AI
Another perk for users with Grammarly Premium is the plagiarism checker. Even though Jasper AI claims that he writes 99% original content, it’s always helpful to confirm. I use it for every blog post I write, and, I must say, it’s an invaluable tool. Sometimes, even my own writing triggers plagiarism in Grammarly. So, you never know what plagiarism score you’ll have with Jasper.
Checking for plagiarism is crucial since Google may penalize your website if you use plagiarized content.
But if you don’t want to upgrade to Grammarly Premium, Jasper AI also includes a plagiarism checker powered by Copyscape, the leading plagiarism detector many use. To access it, click the plagiarism checker icon on the top-right of the screen.
However, to be able to use this feature, you need to add credits in increments of $10, $20, or $100. Credits are subtracted from each document examined at a rate of $0.03 for the first 200 words and $0.01 for each additional 100 words.

Therefore, subscribing to Grammarly Premium is, by far, a better option, as you’ll have access to a top-notch plagiarism checker and advanced grammar tools.
SEO-Optimize Your Blog Post
We’ll now ensure your blog post is SEO-optimized, giving you a better chance of showing up higher in Google’s search results, which might lead to more traffic and money.
If you want to discover how to use Jasper AI to write blog posts that rank on Google, I suggest you follow these two steps:
- Optimize your blog post with the Surfer SEO integration.
- Use the free Rank Math WordPress plugin for further optimization.
How To SEO-Optimize Your Jasper Blog Post With Surfer SEO
The first step to SEO-optimize your blog post is to use Surfer SEO, a fantastic AI SEO tool that uses natural language processing (NLP) extracted from the top-ranking pages on Google to help you out.
NLP terms are keywords semantically relevant to your content. It refers to the keywords Google expects to find on your content that are associated with your primary keyword.
Fortunately, Jasper AI includes a Surfer SEO add-on.
To be able to take advantage of the partnership between Jasper AI and Surfer SEO, you need to have the Teams plan active.
Surfer SEO is not free, but you can get a 30-day trial when subscribing to the Jasper AI Teams plan.
To activate the Surfer SEO add-on inside Jasper’s long-form editor, follow these steps:
- Go to your Jasper account settings.
- Under Workspace, head to Surfer SEO in the Customizations Panel and toggle it “On.”
- Follow the steps for your 30-day trial.
- Once turned on, you’ll see a new icon on your Documents editor.

When your Surfer SEO account is ready, you can select the target keyword for your blog post and insert it in Surfer’s content editor’s keyword box. Then click on Create Content Editor and wait a few seconds to Surfer generate the content editor.

For this example, let’s suppose my target keyword is “how to write blog posts with AI that rank on Google.”
After clicking on the generated content editor under the list, you’ll have something like this.

All the red NLP terms you see are keywords you should consider including in your text to optimize it to have better chances of ranking on Google.
Surfer SEO gets these keywords by analyzing the top-performing articles for the target keyword you entered. By increasing your Surfer SEO score to the green portion of the scale, you’ll have higher chances of ranking in search engines.
Make sure you check my SEO copywriting tips to help you achieve higher rankings.
How To SEO-Optimize Your Jasper Blog Post With Rank Math
I recommend the Rank Math WordPress plugin for this. It has excellent free features, and Rank Math Premium unlocks much more advanced tools to give you a competitive advantage.
Once you’ve installed and activated Rank Math on your website, you’ll notice an indicator in the upper-right corner of your WordPress Gutenberg editor that tells you how well your article is optimized for the target keyword of your choice.
The indicator’s colors range from red to orange to green, with green being the best. However, don’t be too concerned about getting every blog post green. I have non-green blog posts ranking on Google’s first page.
Rank Math recommendations are just that: recommendations. They provide no guarantees that your blog post will rank highly on Google. Your blog posts should be created with human readers in mind, not search engine robots.
Rank Math will, without a doubt, provide you with some valuable recommendations that you can use in order to improve the position of your Jasper AI blog post in Google’s search results.
Import Your Blog Post To WordPress
Now that your blog post is ready and SEO-optimized, you need to import it to WordPress.
You can select the entire text and copy-paste it right inside the Gutenberg editor (the WordPress editor).
You can also copy the text to a Google Document as an alternative, insert images if you want, and export it as a DOCX file. You can import this file directly to your WordPress blog post editor using the Mammoth Docx converter plugin. If you have any images, they will also be imported.
Note: If there are images in the DOCX file, make sure their Alt Text Description is filled out inside the Google Document since it will immediately convert to the file name inside WordPress. If you forget to add this data, your image will be named word-image.jpeg.

Publish Your Jasper AI-Generated Blog Post
You’re ready to publish your article once you’ve copied your Jasper blog post over to WordPress and optimized it for SEO using Surfer SEO and Rank Math. In your Gutenberg editor, click the blue Publish button in the top-right corner.
Done! You’ve created and published your blog post with the help of Jasper AI!
Depending on the target keyword’s difficulty and competitiveness, your blog post can rank in a couple of days or weeks. Some of my articles ranked on Google’s first page in two days simply because I was targeting a long-tail keyword with almost no competition and optimized it heavily with Surfer SEO.
Ultimately, it all depends on your keyword research and how well the article is SEO-optimized.
Once more, there is no assurance that you will appear on Google’s first pages. However, your chances of appearing on the first page of Google are substantially higher if you followed all the instructions in this guide to create high-quality content using Jasper’s assistance and ensured it was well SEO-optimized with Surfer SEO and Rank Math.
Using a Blog Post Recipe
You can make use of Jasper Recipes to hasten the process of writing your blog post with Jasper. You can follow my guide on writing blog posts with Jasper Recipes.
To leverage Jasper Recipes, you first need to open the recipe, save it to your account, and hit Run. By following this guide on how to write a blog post with Jasper AI, you’ll get to the finish line sooner than you think.
Blog Post’s Transition Words
Jasper is an AI writing tool that needs guidance.
If you only hit the Compose button and do not guide Jasper, the generated content might get a bit off track.
Because of this, it’s best to guide him with transition words. This will help Jasper keep on track and create more engaging content for your blog post.
Here are some examples of transition words you can use when writing blog posts with Jasper AI:
- In fact,
- As a matter of fact,
- However,
- Additionally,
- Finally,
- Nevertheless,
- Therefore,
- On the other hand,
- As an example,
- In conclusion,
- Concluding,
- Etc.
When creating blog articles using Jasper, using transition words can significantly assist your blog post flow much better and will keep Jasper on track, preventing it from veering off course and producing a bunch of rubbish and jibberish instead of providing useful content.
You are free to be even more explicit with your transitions if there is a topic in particular that you would like Jasper to discuss.
Conclusion
Jasper is one of the best AI writing assistants for long-form articles that can help you write better blog posts in a fraction of the time.
If you follow the steps outlined in this article about how to write blog posts with Jasper AI, you will create more content faster than ever and improve your chances of ranking on Google.
To get started with Jasper AI, you can claim your 7-day free trial with unlimited words and begin writing your blog post with Jasper’s assistance.
How’s your experience with Jasper AI so far? Would you like to add anything to this article? Let me know in the comments.
Great Blog post did you write this with Jasper i also have unlimeted boss mode plan before they closed that plan.
cheers!
Hi Rob, I didn’t use Jasper AI on this post. Although great, he still can’t replace our brains.
I’ve tested a number of articles generated by Jasper.ai through various AI detection tools, and all have returned results showing they were written by 100% AI.
The question arises: what value does Jasper.ai bring to the table for SEO content writing? I am aware of Google’s current stance on AI-generated content, particularly if it is being produced for the end user.
However, if AI-generated content starts to saturate the Internet, it’s likely Google will eventually prioritize identifying whether content is AI-produced or human-written. If Google determines the content is AI-created, it might stop to index it. This is a possibility we might face sooner or later.
Alternatively, provide me with sample blog posts composed using Jasper.ai, and I’ll put them through AI detection tools for analysis.
What’s your thought on it?
Hi Harry,
Yes, I do believe that eventually, Google will prioritize human-written content, particularly if AI-generated content becomes widespread. It’s important to keep in mind that AI writing tools, like Jasper, are designed to assist rather than replace. We should always refine and personalize the content, as AI-generated content can often be too generic and lacking in personality.
Thankfully, there are some undetectable AI writing tools that can produce content that bypasses AI detectors. However, we should never just copy and paste the output as-is. For me, AI writing tools are excellent for overcoming writer’s block and creating a first draft.
Naturally, skilled writers with expertise in their subject matter may not require AI tools. However, for others who aren’t professional writers or don’t even have English as their first language, these tools can help them hit the ground running.